Horse Drawing Easy: Your Simple Guide To Sketching A Beautiful Steed Today
Detail Author:
- Name : Earlene Konopelski PhD
- Username : elta29
- Email : lottie49@ohara.com
- Birthdate : 1994-05-11
- Address : 151 Abner Groves Lake Evert, NY 85432-2458
- Phone : +16234512601
- Company : Breitenberg Group
- Job : Set Designer
- Bio : Laborum libero nulla voluptatem. Sapiente aut ut qui occaecati. Libero est sequi ipsam excepturi numquam repudiandae magni. Consequatur rerum incidunt fugit modi quae.
Socials
twitter:
- url : https://twitter.com/bella.cummings
- username : bella.cummings
- bio : Beatae voluptate omnis est. Molestiae voluptatem unde porro.
- followers : 2734
- following : 1691
linkedin:
- url : https://linkedin.com/in/bcummings
- username : bcummings
- bio : Ea fugit corrupti quia possimus unde.
- followers : 2671
- following : 2486
facebook:
- url : https://facebook.com/bellacummings
- username : bellacummings
- bio : Repudiandae veniam in numquam. Possimus rerum deleniti odio velit natus.
- followers : 4141
- following : 1360
Have you ever looked at a magnificent horse and thought, "I wish I could draw something like that"? It's a common feeling, that, very often, drawing a horse seems like a really big challenge. Perhaps you've tried before, only to feel a bit overwhelmed by all the details. Well, you know, the good news is that creating a lovely horse picture doesn't have to be hard at all. Actually, it can be quite simple and a lot of fun, even if you are just starting out with art.
Many people believe that drawing animals, especially horses, needs some kind of special talent. But, honestly, it's more about knowing a few basic steps and taking things one bit at a time. This guide, you see, is all about making horse drawing easy for everyone. We will walk you through each part of the process, showing you how to turn simple shapes into a pretty horse or a cute pony. It's truly for beginners, or, like your, anyone wanting to get better at drawing these amazing creatures.
So, whether you dream of sketching a majestic wild horse or just a friendly farm pony, this step-by-step art tutorial is here to help. You will discover that, with a little guidance, drawing a great looking easy horse is totally within your reach. Grab a piece of paper, a pencil, and get ready to have a really good time creating something wonderful. We're going to make this drawing experience as smooth and enjoyable as possible, more or less, for everyone.
Table of Contents
- Getting Ready for Your Horse Drawing Adventure
- The Basics of Horse Drawing Easy: Simple Shapes First
- Bringing Your Horse to Life: Adding Legs and Features
- Adding the Finer Details: Mane, Tail, and Coat
- Tips for Making Your Horse Drawing Even Easier
- Frequently Asked Questions About Drawing Horses
- Your Next Steps in Easy Horse Drawing
Getting Ready for Your Horse Drawing Adventure
Before you even make your first mark on the paper, it's a good idea to get everything ready. This part is, you know, just as important as the drawing itself. Having the right tools and a calm mind can really make a big difference in how your drawing turns out. So, take a moment to prepare your creative space, apparently, before you begin.
Gathering Your Simple Supplies
You don't need a lot of fancy art stuff to draw a horse. For this easy guide, you really just need a few basic things. First off, grab a piece of paper, any kind will do, like your printer paper or a sketchpad. Then, you'll want a pencil; a regular number 2 pencil works perfectly well. And, you know, an eraser is always a good idea for those little adjustments. That's pretty much it for your essential tools, more or less.
Sometimes, having a few different pencils can be helpful, like one that's a bit lighter for sketching and one that's darker for lines. But, honestly, for a simple horse drawing, one good pencil is plenty. You might also want a sharpener close by, just in case your pencil gets dull. These simple supplies are, you know, all you truly need to start your art project right now.
Setting the Mood for Creativity
Drawing should be a fun and relaxing activity, not something that makes you feel stressed. So, before you start, try to find a quiet spot where you can focus without too many distractions. Maybe put on some calming music or just enjoy the quiet around you. The idea is to feel comfortable and ready to create, sort of, in your own way.
Remember, this is about having fun and learning something new. Don't worry about making everything perfect on your first try; it's okay if your lines aren't exactly straight or if your horse looks a little quirky. Every artist starts somewhere, and every drawing is a step in your learning. Just relax, enjoy the process, and, you know, let your imagination flow freely.
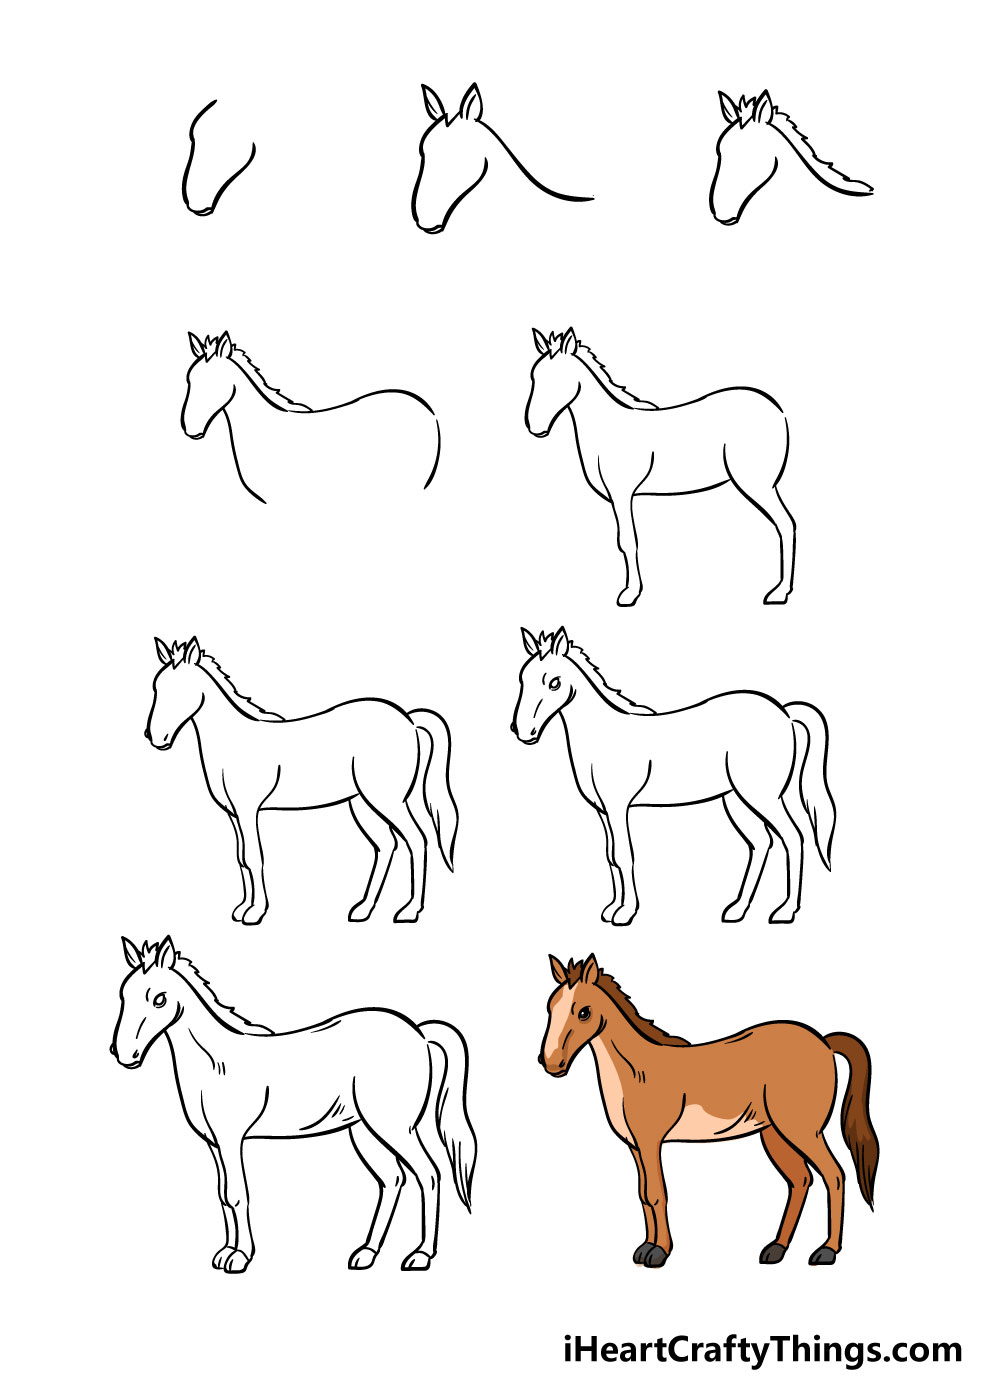
The Basics of Horse Drawing Easy: Simple Shapes First
The secret to drawing a horse, especially when you want it to be easy, is to start with simple shapes. Think of it like building blocks. You begin with basic forms like circles, ovals, and lines, and then you gradually connect them and add details. This method makes the whole process much less scary and, well, more manageable for anyone, pretty much.
You might be surprised at how much a complex animal like a horse can be broken down into these simple beginnings. It's a way to get the overall size and position right before you worry about the smaller bits. This approach, you know, really helps in getting the proportions correct from the start, which is a big help.
Outlining the Head and Neck
To begin your horse, start by sketching out its basic shape. We will focus on the head and neck first. Draw a simple oval or a slightly squarish circle for the head, kind of like a light bulb shape. Then, from that head shape, draw two curved lines extending downwards to form the neck. These lines should, you know, gently curve out to suggest the thickness of the neck.
Don't press too hard with your pencil at this stage. These are just light guide lines that you can easily erase later. Think of them as the skeleton of your drawing. You're just getting the general placement and size down. This initial sketch is, like your, the very first step in bringing your horse to life on paper, you know.
Building the Body from Simple Forms
Now that you have the head and neck, let's add the body. For the main body, you can draw a larger oval or a sort of bean shape connected to the neck lines. This oval should be quite a bit bigger than the head oval, obviously, and it will be the horse's chest and belly area. Make sure it connects smoothly to the neck, so it looks like one continuous form.
You might want to sketch another, slightly smaller oval behind the first one for the horse's hindquarters, connecting it to the first body shape. This helps to give the horse its full length and shape. Remember to keep these lines light and sketchy. You are, basically, just blocking out the main parts of your horse right now, getting the general feel of it.
Bringing Your Horse to Life: Adding Legs and Features
Once you have the basic head, neck, and body shapes in place, your horse is really starting to take form. Now comes the exciting part of adding the legs and giving your horse a face. These steps will make your drawing look more like a real horse and, you know, less like a collection of ovals. It's where the character starts to show through, really.
Adding the limbs can seem a bit tricky, but by breaking it down, it becomes much simpler. Just remember to keep the proportions in mind, even though we are going for an easy, cartoonish style. The goal is to make it look balanced and, you know, like a horse that could actually stand up and walk around.
Sketching the Legs and Hooves
Next, add in the legs and hooves. For each leg, start by drawing two simple lines extending down from the body. These lines will be the upper and lower parts of the leg. You can add small circles or ovals for the joints, like the knees and hocks, to help guide you. Then, connect these lines to form the shape of the leg, making it a bit wider at the top and narrower towards the bottom. This is, you know, a pretty straightforward way to get the limbs in place.
For the hooves, draw small, somewhat rectangular or rounded shapes at the very bottom of each leg. They don't need to be super detailed at this stage; just get the basic form down. Make sure the legs look like they can support the horse's body. You are, in a way, giving your horse its foundation to stand on, so, you know, take your time with this part.
Giving Your Horse a Face and Expression
Now, let's bring some life to your horse's face. Within the head shape you drew earlier, you can add simple circles for the eyes. Think about where a horse's eyes would naturally be, a bit to the side of the head. Then, for the muzzle, draw a gentle curve at the end of the head shape, adding two small dots or ovals for the nostrils. A simple line for the mouth, maybe a slight curve, can give your horse a friendly expression. It's, like, pretty cool how a few lines can change things.
You can also add two small, pointed shapes on top of the head for the ears. They should point slightly upwards and forwards. Remember, this is a pretty cartoon horse or pony drawing for beginners, so you don't need to worry about perfect realism. Just aim for clear, recognizable features. This step, you know, really starts to give your horse its unique personality.
Adding the Finer Details: Mane, Tail, and Coat
With the main structure of your horse complete, it's time to add the charming details that truly make it a horse. These are the parts that give your drawing movement and character. Think about the flowing hair of the mane and tail, and the texture of its coat. These touches, you know, really make a difference to the overall look.
This is where your horse starts to look less like a sketch and more like a finished piece of art. You can play around with different styles for the mane and tail, making them long and flowing or short and neat. It's, sort of, your chance to add your own personal touch to the drawing, which is pretty neat.
Crafting a Flowing Mane and Tail
Finally, detail the horse’s coat and mane/tail. For the mane, draw a series of curved lines starting from the top of the horse's neck, just behind the ears, and extending down the neck. You can make these lines wavy or straight, depending on the look you want. Think about how hair flows and try to capture that movement. This is, basically, what gives your horse its distinctive silhouette, you know.
For the tail, draw a larger, more sweeping shape extending from the horse's hindquarters. Again, use curved lines to suggest the flow and volume of the tail hair. You can make it long and bushy or shorter and more refined. This part, in a way, adds a lot of life and energy to your horse drawing. It's, like, the final flourish, pretty much.
Detailing the Coat and Markings
Now, let's think about the horse's coat. You can add simple lines or shading to suggest the texture of its fur. If you want to add markings, like a star on its forehead or socks on its legs, this is the time to do it. Just draw simple shapes for these markings and fill them in lightly. You don't need to go crazy with detail here; simple is better for an easy drawing. This step, you know, really helps to make your horse unique.
You can also use your eraser to clean up any extra guide lines you drew at the beginning. This will make your horse drawing look much neater and more finished. Take a step back and look at your drawing. Are there any small areas you want to refine? Remember, it's your drawing, so, you know, make it look just how you want it.
Tips for Making Your Horse Drawing Even Easier
Drawing horses, even easy ones, is a skill that gets better with time and practice. There are always little things you can do to make the process smoother and your results more pleasing. These tips are, honestly, just general advice to help you enjoy your art journey even more. They are, you know, pretty helpful for anyone wanting to get better.
Remember, the goal is to have fun and build confidence in your abilities. Don't feel pressured to create a masterpiece every time you pick up a pencil. Every drawing is a chance to learn and, well, just enjoy the creative process. So, keep these ideas in mind as you continue to draw, more or less.
Practice Makes a Big Difference
The more you draw, the better you will get. It's as simple as that. Try drawing a horse every day, or a few times a week, even if it's just a quick sketch. Each time, you'll learn something new about shapes, proportions, and how your hand works with the pencil. Repetition, you know, really builds muscle memory and confidence.
Don't be afraid to try different styles or to draw horses in different positions. The more you experiment, the more comfortable you'll become with the subject. Just keep drawing, and you'll see your skills grow over time. It's, like, a very rewarding process, you know, when you see your own progress.
Looking at Real Horses Helps
Even though we're focusing on a pretty cartoon horse, looking at real horses can still be very helpful. Pay attention to how their bodies are shaped, how their legs bend, and how their manes and tails flow. You don't need to copy them exactly, but observing real animals can give you ideas for your drawings. It's, sort of, like doing a little bit of research for your art.
You can look at pictures or videos of horses online, or if you're lucky enough, see them in person. Notice the different breeds and their unique features. This kind of observation, you know, helps you build a mental library of horse shapes and forms, which can make your drawings feel more authentic, even in a simplified style.
Don't Be Afraid to Try Again
Sometimes, a drawing just doesn't turn out the way you hoped. That's perfectly normal, and, you know, it happens to every artist. Don't get discouraged if your first attempt isn't perfect. Instead, see it as a learning opportunity. What could you do differently next time? This mindset, you know, is really important for growth.
Grab a fresh piece of paper and start over. Or, if you prefer, try to fix what you have. The important thing is to keep going and not give up. Every drawing, even the ones you don't love, teaches you something valuable. So, just keep at it, and you'll get there, pretty much, with practice and persistence.
Frequently Asked Questions About Drawing Horses
People often have similar questions when they start drawing horses. We've gathered some common ones to help clear up any confusion you might have. These questions are, you know, things that come up a lot for beginners, so you're definitely not alone in wondering about them.
We want to make sure you feel confident and ready to tackle your horse drawing. So, if you've been pondering some of these things, hopefully, these answers will give you a bit more clarity and encouragement. It's, like, all part of the learning process, really.
What are the basic shapes for drawing a horse?
To draw a horse, you start by sketching out its basic shape using simple forms. You can use ovals for the head and body, and then connect them with lines for the neck and legs. A small circle or oval can represent the muzzle. These shapes are, you know, like the foundation of your drawing, helping you get the proportions right before adding details. It's, like, building blocks, basically.
How do I make my horse drawing look realistic?
While this guide focuses on making horse drawing easy and a bit cartoon-like, to make a horse drawing look more realistic, you would pay closer attention to anatomy and shading. Observe real horses to understand muscle structure and bone placement. Use varying line weights and different shades of pencil to create depth and texture. Adding subtle shadows and highlights can also make it appear more three-dimensional. It's, like, a gradual process of adding more and more details, you know.
What materials do I need to draw a horse?
For an easy horse drawing, you really only need a few basic art supplies. A piece of paper, a pencil (a regular number 2 pencil works great), and an eraser are the essentials. You might also find a pencil sharpener useful. As you get more comfortable, you could try different types of pencils for varying darkness or even colored pencils. But for starting out, these simple items are, you know, all you truly require to get going. You can find more about art supplies at a good art supply guide, too.
Your Next Steps in Easy Horse Drawing
You've now got a good grasp on how to draw a horse using simple steps. From simple shapes to adding the mane and tail, you've learned the core techniques. Remember, drawing horses are fun to draw, but it can be intimidating if you’ve never done it before. Luckily, drawing a simple horse is easy and quick once you know how. By following the simple steps, you too can easily draw a perfect easy horse.
Keep practicing these steps, and don't hesitate to experiment with your own style. Every time you draw, you improve a little bit more. You can learn more about on our site, and also link to this page for other helpful drawing tips. We hope this guide has made horse drawing easy and enjoyable for you, and that you feel inspired to keep creating. Happy drawing!
Horse Drawing - How To Draw A Horse Step By Step!

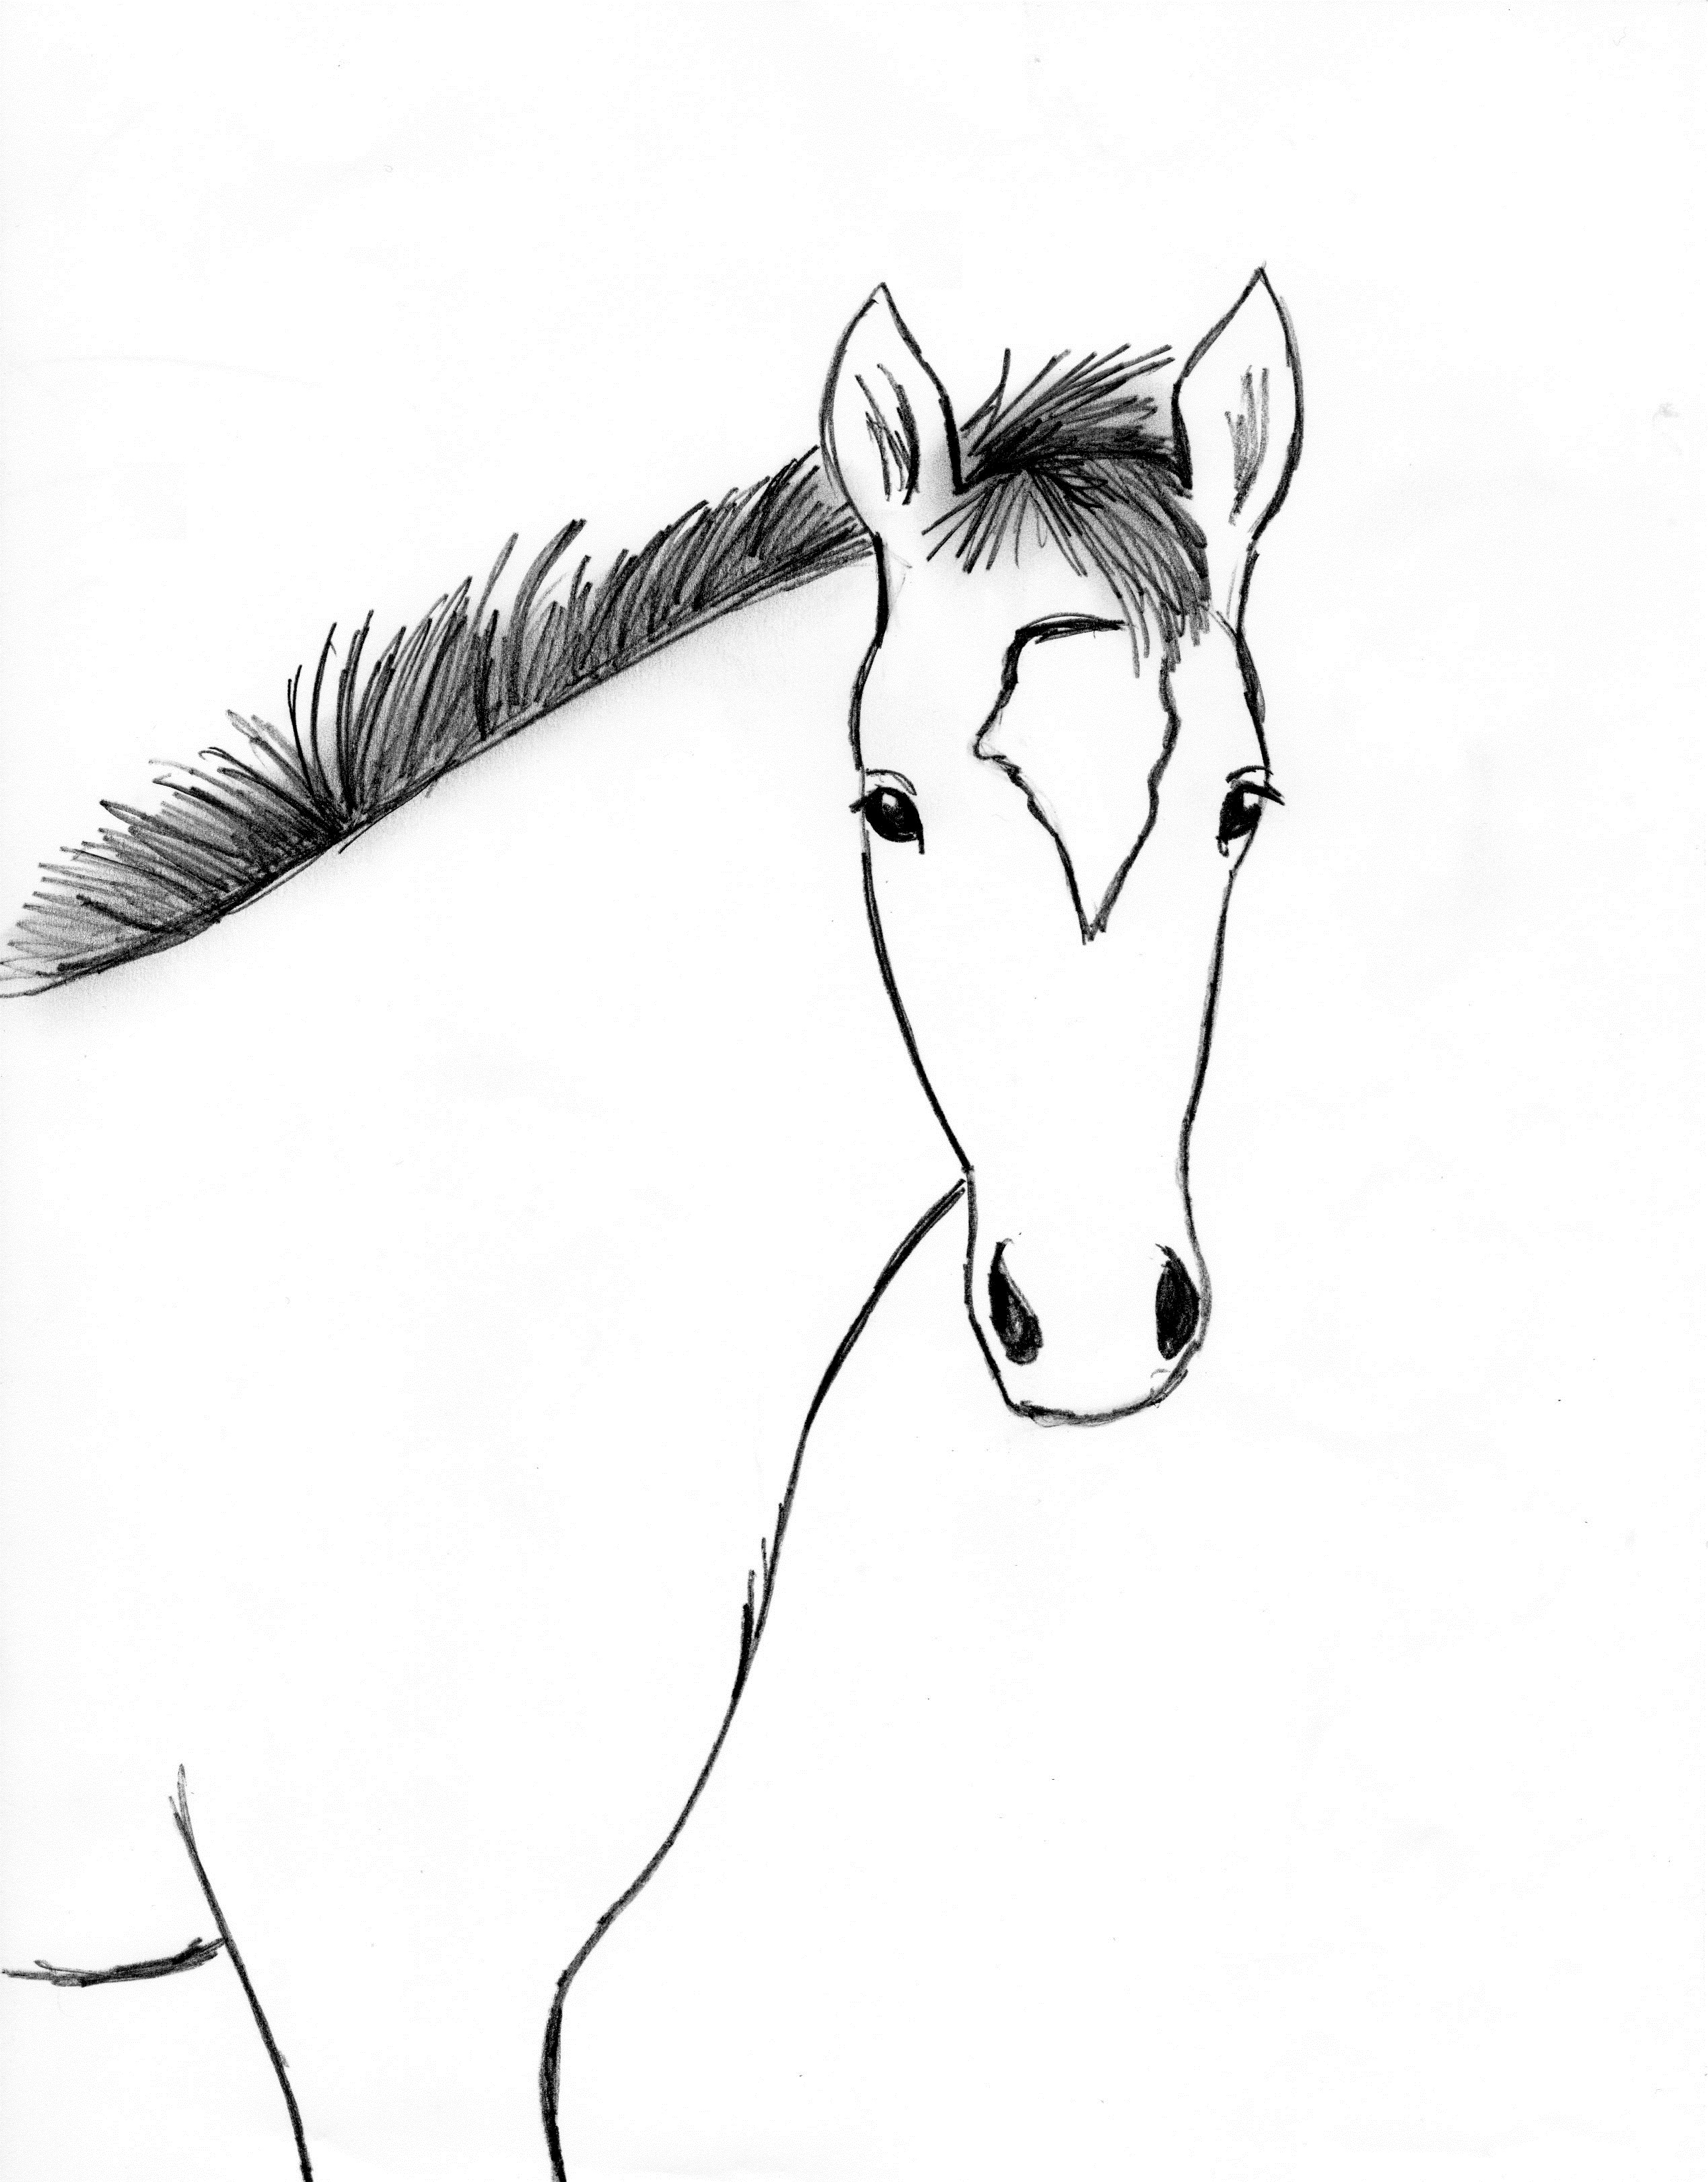
Horse drawing – simple – Line art illustrations
Horse Drawing Step By Step - Samantha Bell
