Mastering The Bolillo Roll: Your Guide To Authentic Mexican Bread At Home
Detail Author:
- Name : Earlene Konopelski PhD
- Username : elta29
- Email : lottie49@ohara.com
- Birthdate : 1994-05-11
- Address : 151 Abner Groves Lake Evert, NY 85432-2458
- Phone : +16234512601
- Company : Breitenberg Group
- Job : Set Designer
- Bio : Laborum libero nulla voluptatem. Sapiente aut ut qui occaecati. Libero est sequi ipsam excepturi numquam repudiandae magni. Consequatur rerum incidunt fugit modi quae.
Socials
twitter:
- url : https://twitter.com/bella.cummings
- username : bella.cummings
- bio : Beatae voluptate omnis est. Molestiae voluptatem unde porro.
- followers : 2734
- following : 1691
linkedin:
- url : https://linkedin.com/in/bcummings
- username : bcummings
- bio : Ea fugit corrupti quia possimus unde.
- followers : 2671
- following : 2486
facebook:
- url : https://facebook.com/bellacummings
- username : bellacummings
- bio : Repudiandae veniam in numquam. Possimus rerum deleniti odio velit natus.
- followers : 4141
- following : 1360
Have you ever tasted a Mexican sandwich, maybe a torta, and wondered about the amazing bread that holds it all together? That, my friend, is often the humble, yet truly wonderful, bolillo roll. It’s a staple, a beloved part of daily life in Mexico and Central America, and honestly, once you try one, you’ll understand why it’s so popular. This bread, known for its distinct crunch on the outside and a really soft, fluffy inside, is just perfect for so many things. It’s not just bread; it’s a bit of culinary history, you know, right there in your hands.
So, too it's almost, if you’re someone who loves to bake or just enjoys good food, learning about the bolillo roll is a really rewarding experience. This isn't just any ordinary bread; it’s a type of savory bread that holds a special place in people's hearts. From the busy streets of Mexico City to quiet family kitchens, the bolillo is, in a way, everywhere. It’s what makes a torta truly a torta, and it’s what people reach for when they want a simple, satisfying bite. We’re going to look at what makes this roll so unique and, perhaps, how you can bring a piece of that tradition into your own home.
You see, there’s something quite special about making bread from scratch, and the bolillo roll, with its light, airy inside and that beautifully golden, crispy crust, is no exception. It’s surprisingly simple to create, despite its iconic status, and it’s super versatile. Whether you call it a bolillo in Mexico or pan francés in Central America, meaning French bread, its charm is pretty universal. This article will walk you through how to make Mexican bolillo rolls from scratch with just a handful of ingredients and simple tools, so you can enjoy these amazing rolls whenever you like. It’s a rather satisfying process, actually.
Table of Contents
- What is a Bolillo Roll, Anyway?
- Why Make Bolillo Rolls at Home?
- Getting Started with Your Bolillo Roll Recipe
- The Traditional Method of Making Bolillo Rolls
- Tips for Perfect Bolillo Rolls Every Time
- Serving Your Homemade Bolillo Rolls
- Frequently Asked Questions About Bolillo Rolls
What is a Bolillo Roll, Anyway?
So, what exactly is a bolillo roll? Well, it’s a type of savory bread made in Mexico and Central America, known by a couple of names, actually. In Mexico, it’s called a bolillo, and in Central America, it’s often referred to as pan francés, which, you know, literally means French bread. This name hints at its origins, possibly from French baking techniques brought over, but the bolillo has certainly made itself distinctly Mexican. It’s not just a roll; it’s a key part of the food culture there, very much a daily bread for many people. It’s also, in some respects, quite a simple bread, but its impact on cuisine is huge.
The Texture That Captivates
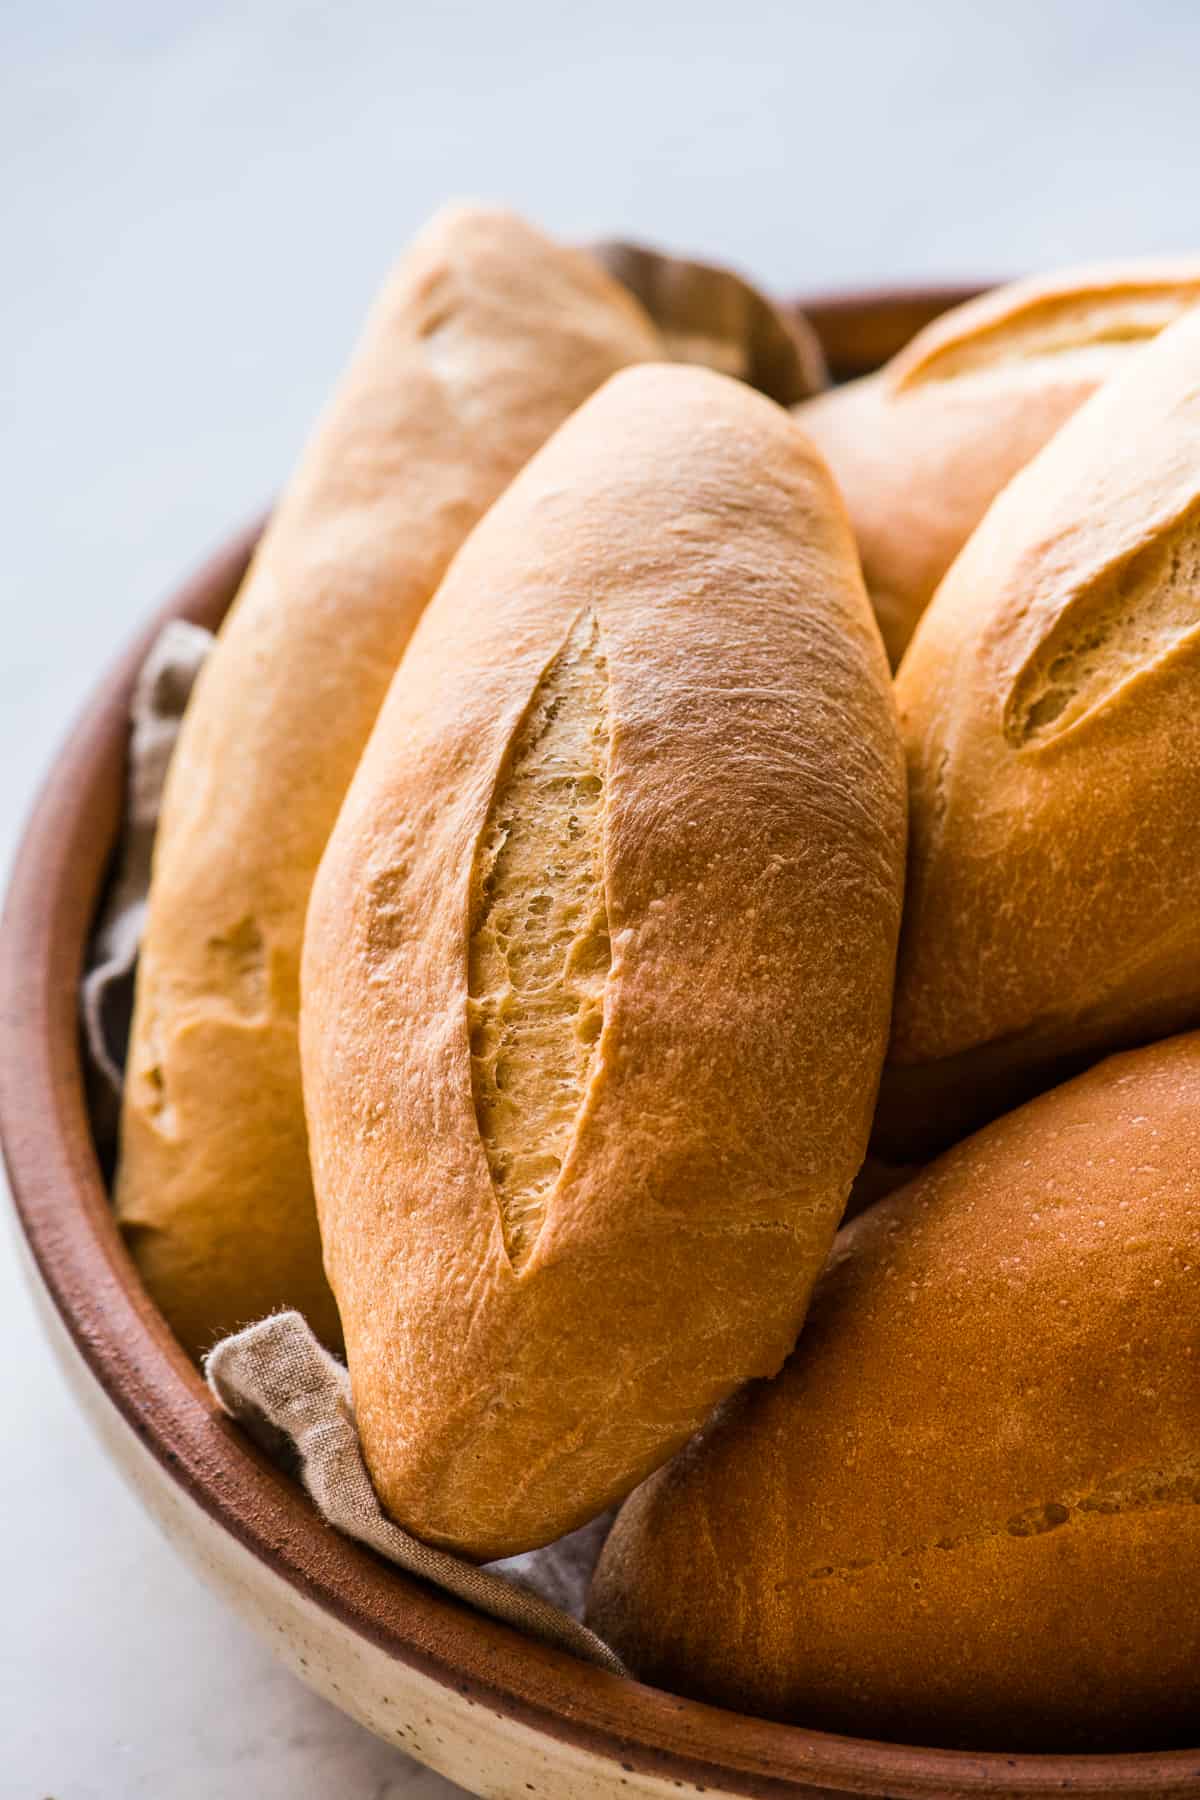
One of the first things you notice about a bolillo roll is its amazing texture. My text describes it perfectly: it features a crusty exterior and a soft and pillowy inside. This contrast is, you know, what makes it so appealing. The outside gives you that satisfying crunch when you bite into it, while the inside is wonderfully light and airy. It’s not dense or heavy at all, which is really important for its main uses. This combination of textures is, apparently, a hallmark of a well-made bolillo, and it’s something bakers really aim for. It’s what makes them so good for soaking up flavors, too.
Its Distinctive Shape
Beyond the texture, the bolillo roll has a very recognizable shape. They have an oval shape with slightly pointed ends, giving them that, you know, classic look. This isn't just for looks, though; the shape helps create that perfect crust-to-crumb ratio, ensuring you get a good bit of crispiness with every bite. It’s a bit like a mini baguette in form, but with its own unique character. This particular shape also makes them just right for slicing open and filling, which is, obviously, a big part of their purpose in Mexican cuisine. It’s a practical shape, you might say, for a very practical bread.
Cultural Importance and Uses
Mexican bolillos (crusty rolls) are the most famous savory bread in the country, and that’s not an exaggeration. They’re super versatile, addictively delicious, and surprisingly simple to make, as we’ll see. You’ll learn why they’re culturally important, you know, as a staple. They are, for example, ideal for making tortas, which are Mexican sandwiches. The soft inside and crunchy outside of a bolillo are just perfect for holding all those flavorful fillings without getting soggy too quickly. But it’s not just tortas; they’re also eaten alongside meals, used to scoop up sauces, or simply enjoyed with a bit of butter or jam. They are, you know, a daily bread for many, a common sight on any breakfast table or dinner table, really.
Why Make Bolillo Rolls at Home?
There’s a real joy in baking your own bread, and making bolillo rolls at home is, honestly, a very rewarding experience. My text says, "Bake bread buns and try this Mexican bolillo bread rolls recipe it will show you how easy it is to make bolillos from scratch." This is really true. When you make them yourself, you get that incredible aroma filling your kitchen, and the taste of freshly baked bread is just something else. Plus, you control the ingredients, which is, you know, always a good thing. It’s a chance to connect with a traditional method, to learn how to make the perfect bolillo bread, and to create something truly delicious for your family and friends. It’s a bit of a project, but a very satisfying one, actually.
Moreover, having fresh bolillo rolls at your fingertips means you can whip up authentic tortas or other Mexican dishes whenever the craving strikes. There’s a distinct difference between store-bought and homemade, especially with bread like this. The crust is crispier, the inside is softer, and the overall flavor is just, you know, more vibrant. It’s also a wonderful way to, in a way, explore different cultures through food. You get to understand a little more about Mexican culinary traditions by making this iconic bread. It's an experience that’s both tasty and, arguably, quite educational.
Making bolillo rolls at home also means you can enjoy them warm, straight from the oven. That moment when you break open a warm bolillo, and you hear that gentle crackle of the crust, and you see the steam rise from the soft interior, is, you know, pretty special. It’s a simple pleasure, but a profound one. This kind of freshness is something you really can't buy. So, if you’re looking for a fun baking project that yields incredibly delicious results, diving into making your own bolillo rolls is, essentially, a fantastic idea. It's a skill that, as a matter of fact, will serve you well.
Getting Started with Your Bolillo Roll Recipe
Learning how to make these traditional Mexican rolls with this easy recipe is, you know, quite accessible. You don’t need a lot of fancy equipment or hard-to-find ingredients. The beauty of the bolillo roll is its simplicity, both in its composition and its creation. This article will walk you through how to make Mexican bolillo rolls from scratch with just a handful of ingredients and simple tools. It’s a process that, honestly, builds confidence in the kitchen. We’ll look at what you’ll need to gather before you start, ensuring you’re ready for a smooth baking experience. It’s all pretty straightforward, actually.
The Simple Ingredients You’ll Need
The core of a bolillo roll recipe is, essentially, quite basic. You’ll need flour, of course, usually all-purpose flour works just fine. Then there’s water, yeast, a little bit of sugar to activate the yeast and give it some food, and some salt for flavor. That’s pretty much it, you know, for the fundamentals. Sometimes, a tiny bit of shortening or lard is used to give a slightly softer crumb, but many traditional recipes stick to the very basic elements. The quality of these simple ingredients, however, can make a difference, so, you know, try to use good ones. It’s amazing what you can create with just a few pantry staples, honestly.
The water temperature is, for example, quite important when you’re working with yeast. It needs to be warm enough to wake up the yeast but not so hot that it kills it. Think of it as, you know, bathwater warm. The type of yeast also matters; active dry yeast or instant yeast are both commonly used. The salt is not just for taste; it also helps control the yeast’s activity and strengthens the dough’s structure. So, while the list of ingredients is short, each one plays a pretty crucial role in creating that perfect bolillo roll. It’s a delicate balance, you know, that results in something wonderful.
For the best results, measuring your ingredients accurately is, actually, a really good idea. Using a kitchen scale for flour and water can make a big difference in consistency, especially if you’re new to bread baking. While it’s an easy bolillo bread recipe, precision helps ensure that crusty exterior and soft, pillowy inside. Don’t worry too much, though, if it’s not absolutely perfect the first time; bread baking is also about feel and intuition, which you develop over time. But, you know, starting with accurate measurements sets you up for success. It’s a bit like following a map, essentially.
Basic Tools for Baking Success
You don’t need a professional bakery setup to make fantastic bolillo rolls. My text mentions "simple tools," and that’s genuinely the case. You’ll need a large mixing bowl, a sturdy spoon or a stand mixer with a dough hook if you have one, and a clean surface for kneading. A baking sheet, of course, is essential for baking the rolls. Parchment paper or a silicone baking mat can be helpful for preventing sticking, but they aren't strictly necessary if you grease your pan well. A sharp knife or a bread lame is useful for scoring the rolls before baking, which helps them expand beautifully and creates that characteristic crust. It's all pretty standard kitchen stuff, you know.
A spray bottle filled with water is, you know, another simple tool that can make a big difference. This is used to create steam in your oven, which is key to getting that wonderfully crusty exterior on your bolillo rolls. Some people also use a cast iron pan or a tray of hot water in the oven for this purpose. A clean kitchen towel or plastic wrap is also handy for covering your dough during its rising times. These tools, while basic, are quite effective in helping you achieve the desired texture and appearance of traditional Mexican rolls. So, you know, gather these things before you start, and you’ll be in good shape.
Having a timer is, arguably, also a good idea for keeping track of your rising times and baking duration. While baking is often about feel, especially with dough, sticking to recommended times for rising can help ensure your bolillos are light and airy inside. A wire rack for cooling the rolls after they come out of the oven is also useful; it allows air to circulate around them, preventing the bottoms from getting soggy. So, you know, with just these few simple items, you are well-equipped to embark on your bolillo-making adventure. It’s not, you know, rocket science, just good old-fashioned baking.
The Traditional Method of Making Bolillo Rolls
Learning the traditional method of making bolillo, the iconic crusty Mexican bread rolls, with this foolproof recipe, is, you know, quite a rewarding process. It involves several steps, but each one is important for achieving that perfect balance of a crispy exterior and a soft, fluffy texture inside. It’s a process that has been passed down through generations, refined over time to produce these beloved rolls. We’ll break it down step by step, making it easy to follow along. It’s a bit like a dance, you know, where each movement contributes to the final beautiful outcome.
Mixing and Kneading the Dough
The first step is to mix your dry ingredients – the flour, salt, and sugar – in your large bowl. Then, you’ll activate your yeast in warm water and add it to the dry mixture. This is where the magic starts, actually. You’ll mix everything until a shaggy dough forms, and then it’s time for kneading. Kneading is crucial for developing the gluten in the flour, which gives the bread its structure and that wonderful chewy, yet soft, interior. It’s a bit of a workout, but it’s very satisfying, you know, to feel the dough transform under your hands. My text implies an easy recipe, and while kneading takes effort, it’s not overly complex.
You can knead by hand on a lightly floured surface, pushing the dough away from you with the heels of your hands, then folding it back, and repeating. Or, if you have a stand mixer with a dough hook, that makes the process much easier. Knead for about 8-10 minutes, or until the dough becomes smooth and elastic. It should spring back slowly when you gently poke it with your finger. This stage is, you know, pretty important for the final texture. A well-kneaded dough is, essentially, the foundation of a great bolillo roll. It’s a step that, arguably, shouldn’t be rushed.
As you knead, you might find the dough a bit sticky at first, but resist the urge to add too much extra flour. A little stickiness is okay; it often means your bread will be more tender. Just keep working it, and it will become less sticky as the gluten develops. This process is, you know, quite meditative for some bakers. It’s about building strength in the dough, allowing it to hold its shape and trap those air bubbles that create the light, airy inside. So, you know, give it your full attention during this stage; it really pays off.
The First Rise: Letting the Dough Rest
Once your dough is beautifully kneaded, it’s time for the first rise, often called bulk fermentation. You’ll place the dough in a lightly oiled bowl, turning it once to coat, then cover it with a clean kitchen towel or plastic wrap. Let it rest in a warm, draft-free place until it has doubled in size. This usually takes about 1 to 1.5 hours, but it can vary depending on the temperature of your kitchen. This rise allows the yeast to work its magic, producing carbon dioxide gas that creates air pockets in the dough, which is, you know, pretty vital for that pillowy texture. It’s a waiting game, essentially, but a very important one.
During this first rise, the flavors of the dough also start to develop. It’s not just about volume; it’s about maturity. The dough becomes more relaxed and easier to work with after this period. You’ll notice it’s softer and more pliable when you gently press on it. This resting period is, you know, quite crucial for the overall structure and taste of your bolillo rolls. Don’t rush it; letting the dough take its time will result in a much better final product. It’s a bit like letting a good wine age, you know, it just gets better with time.
To check if your dough has risen enough, you can do the "poke test." Gently press two fingers into the dough about half an inch deep. If the indentations remain, the dough is ready. If they spring back quickly, it needs a little more time. This is, you know, a simple but effective way to gauge its readiness. The goal here is to get a good, airy dough that will eventually give you that light, airy inside with a beautifully golden, crispy crust. So, you know, be patient during this step; it’s really worth it.
Shaping Your Bolillo Rolls
After the first rise, gently punch down the dough to release the gas, then turn it out onto a lightly floured surface. Now comes the fun part: shaping your bolillo rolls. Divide the dough into equal pieces, usually around 8 to 12, depending on how large you want your rolls to be. Each piece will then be shaped into that characteristic oval with slightly pointed ends. This takes a little practice, but it’s not, you know, overly difficult. You typically flatten each piece into a rectangle, then roll it up tightly from one end to the other, pinching the seam closed. Then, you gently taper the ends. It’s a bit like forming a small torpedo, basically.
The key to good shaping is to create some tension on the surface of the dough, which helps create that crispy crust. As you roll and taper, try to keep the surface smooth and tight. This also helps the rolls hold their shape during the second rise and baking. Place the shaped rolls seam-side down on your prepared baking sheet, leaving some space between them, because they will expand. This stage is, you know, where your bolillos really start to look like the traditional Mexican rolls you know. It’s a precise, yet, in a way, artistic step.
Don’t worry if your first few attempts at shaping aren’t perfect; it’s a skill that improves with practice. The goal is to get that oval shape with slightly pointed ends, giving them that, you know, authentic look. Remember, Mexican bolillos are soft inside and crunchy outside, ideal for making tortas (Mexican sandwiches), and their shape helps achieve this. So, take your time with this step, and enjoy the process of transforming a simple ball of dough into these iconic rolls. It’s a very satisfying part of the baking journey, actually.
The Second Rise for Perfect Texture
Once your bolillo rolls are shaped and placed on the baking sheet, they need a second rise, often called proofing. Cover them again with a clean kitchen towel or plastic wrap and let them rise in a warm place for another 30-45 minutes, or until they look noticeably puffy and light. This second rise is, you know, essential for achieving that light, airy inside. It allows the yeast to produce more gas, creating even more air pockets within the dough, which is, essentially, what gives the bolillo its characteristic crumb. It’s another waiting period, but a shorter one, usually.
During this second rise, your rolls should expand and feel very soft and delicate. Be careful not to let them over-proof, as this can cause them to collapse in the oven. A good way to tell if they’re ready is the gentle poke test again; if the indentation slowly springs back, they’re just right. If it springs back too quickly, they need a bit more time. If it stays completely indented, they might be slightly over-proofed, but they’ll still be edible. This stage is, you know, where the rolls really get their final volume before baking. It’s a pretty important step for achieving that desired texture.
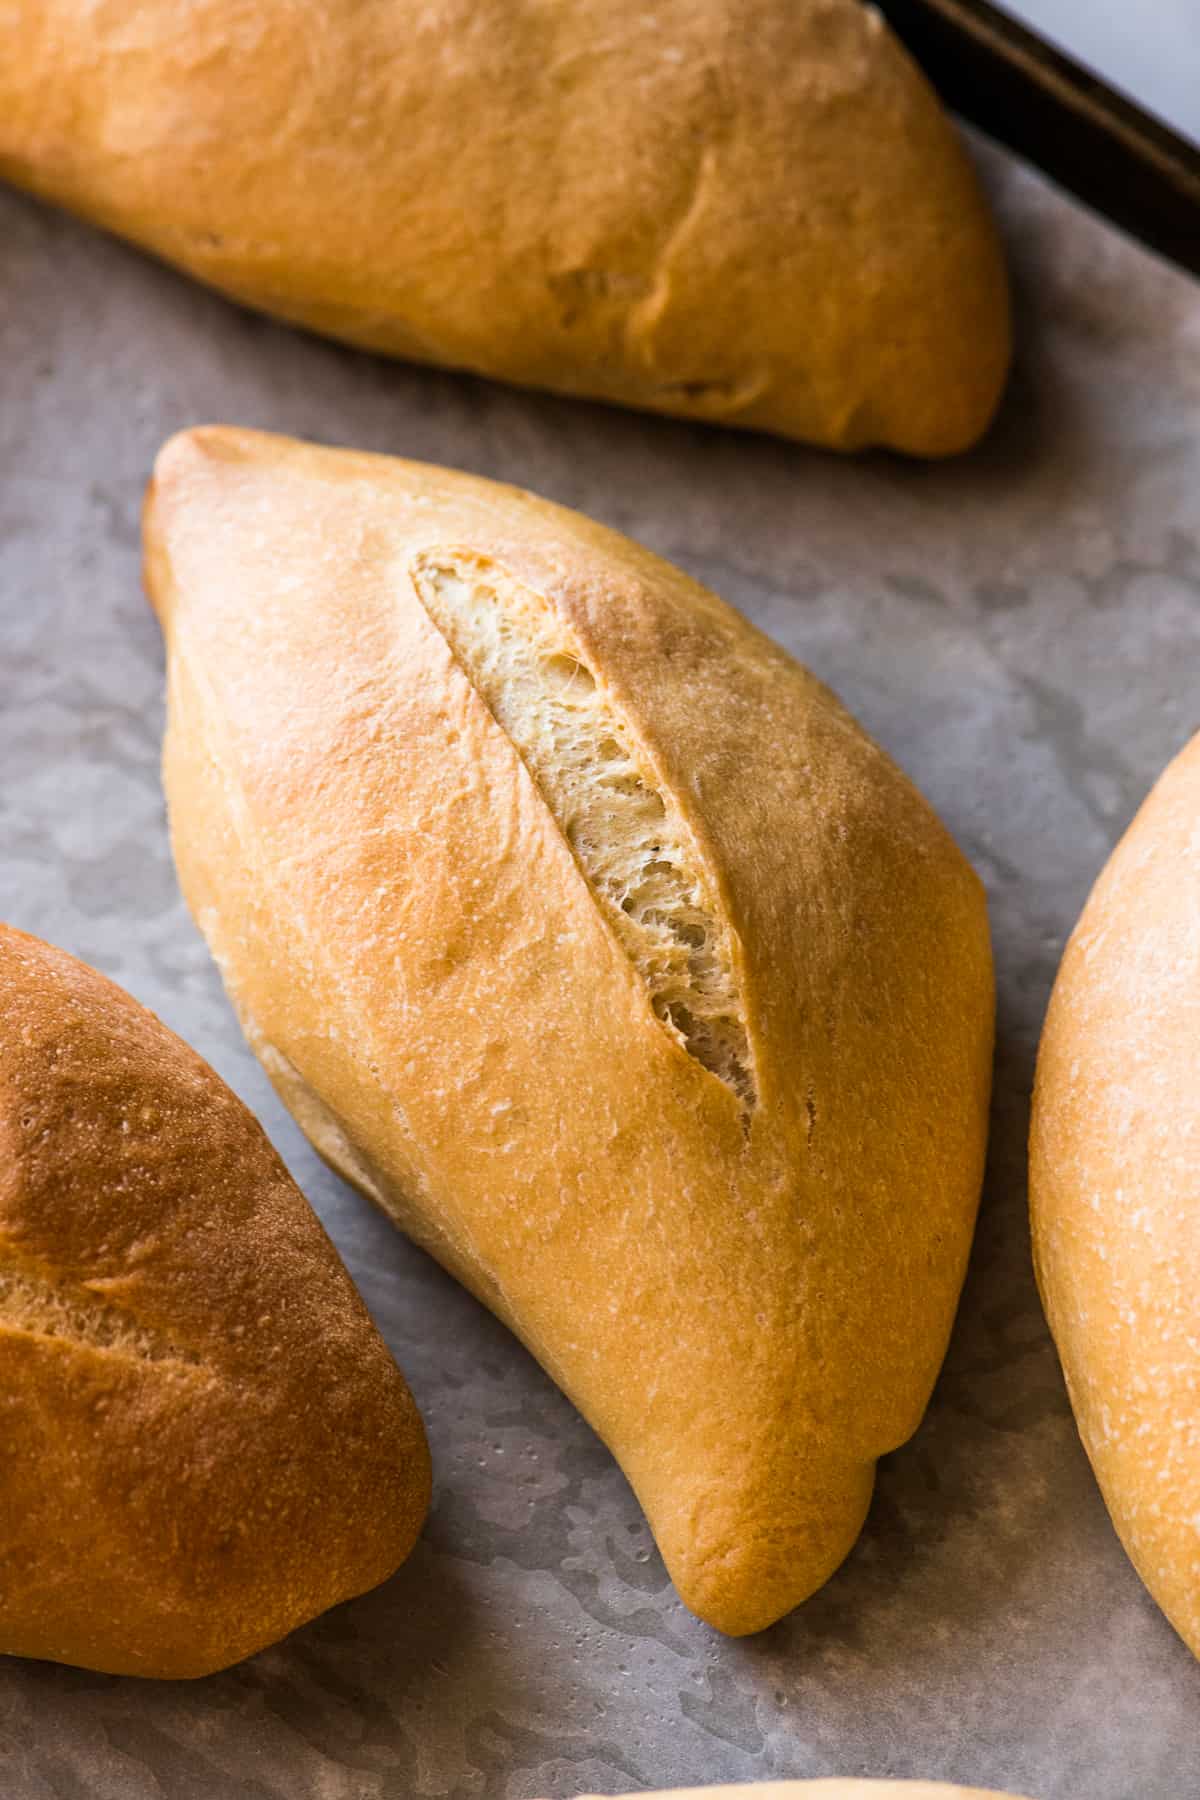
Just before baking, you’ll typically make a single slash down the center of each bolillo roll with a sharp knife or a bread lame. This slash is, you know, not just for aesthetics; it helps control where the bread expands in the oven, ensuring a good "oven spring" and contributing to that classic crusty appearance. It’s a simple detail, but it makes a big difference in the final look and texture of your bolillos. So, you know, don’t skip this step; it’s part of the traditional method for a reason.
Baking for That Iconic Crust
Now for the grand finale: baking your bolillo rolls. Preheat your oven to a high temperature, usually around 400-450°F (200-230°C). The high heat is, you know, crucial for creating that crispy exterior. Many recipes, including traditional ones, also recommend creating steam in the oven during the first few minutes of baking. You can do this by placing a pan of hot water on the bottom rack of your oven or by spraying water onto the oven walls with a spray bottle. The steam helps keep the crust soft initially, allowing the rolls to expand fully before the crust hardens, which is, honestly, a clever trick. It’s what gives them that beautiful golden, crispy crust.
Bake the bolillo rolls for about 20-25 minutes, or until they are deeply golden brown and sound hollow when tapped on the bottom. The baking time can vary depending on your oven, so, you know, keep an eye on them. You want that really nice, dark crust. This is where the magic happens, where the soft dough transforms into those iconic crusty Mexican bread rolls. The aroma filling your kitchen at this point is, arguably, one of the best parts of the whole process. It’s a smell that, you know, just screams fresh bread.
Once they’re baked to perfection, immediately transfer the bolillo rolls to a wire rack to cool completely. Cooling on a rack allows air to circulate around them, preventing the bottoms from becoming soggy and helping to maintain that crisp crust. Resist the urge to cut into them right away, as they continue to cook slightly and firm up as they cool. This waiting period is, you know, a bit of a test of patience, but it’s worth it for the best texture. So, you know, give them time to cool properly; it really makes a difference.
Tips for Perfect Bolillo Rolls Every Time
To ensure your bolillo rolls turn out fantastic every time, there are a few tips that, you know, can really help. First, pay attention to your yeast. Make sure it’s fresh and active. If your yeast doesn’t bubble up when mixed with warm water and sugar, it might be dead, and your dough won’t rise. This is, essentially, the most common reason for bread not rising. So, you know, always check your yeast first. It’s a simple step that saves a lot of potential frustration.
Humidity in your kitchen can also affect your dough. On a humid day, you might need slightly less water, and on a dry day, a tiny bit more. Bread baking is, in a way, an art that adapts to its environment. Don’t be afraid to adjust the flour or water slightly to get the right dough consistency—it should be soft and pliable, but not overly sticky. This intuition comes with practice, you know, so don’t worry if it takes a few tries to get it just right. It’s all part of the learning curve, essentially.
For that amazing crust, the steam in the oven is, you know, truly key. If you don’t have a spray bottle, placing a shallow pan with boiling water on the bottom rack of your oven when you preheat it works wonders. Just be careful when you open the oven door to place the rolls in. This little trick helps create that characteristic crispy exterior that makes bolillos so special. It’s a bit of a pro tip, you might say, for home bakers. So, you know, give it a try for that extra crunch.
Don’t over-knead your dough, but don’t under-knead it either. It should be smooth and elastic, passing the windowpane test (where you can stretch a small piece of dough thin enough to see light through it without tearing). This indicates good gluten development. Also, don’t rush the rising times. Letting the dough rise slowly in a warm, draft-free place results in better flavor and texture. Patience is, you know, a real virtue in bread baking. It’s a process that, actually, rewards those who wait.
Finally, once your bolillos are baked, store them properly to keep them fresh. They are best eaten the day they are baked, but you can store them in a paper bag at room temperature for a day or two, or freeze them for longer storage. Reheating them in a toaster oven can bring back some of that amazing crispiness. So, you know, enjoy your fresh, homemade bolillo rolls, and don’t be afraid to experiment a little with the recipe to make it your own. It’s a very satisfying journey, honestly.
Serving Your Homemade Bolillo Rolls
Now that you’ve gone through the process of making these wonderful bolillo rolls, it’s time to enjoy them! My text mentions they are "ideal for making tortas (Mexican sandwiches)," and that’s certainly a fantastic way to use them. Slice them lengthwise, fill them with your favorite meats, cheeses, beans, avocado, and salsa, and you’ve got an authentic and incredibly satisfying meal. The crusty exterior holds up beautifully to the fillings, while the soft interior soaks up all the delicious juices. It’s, you know, the perfect vehicle for a hearty sandwich.
But the versatility of the bolillo roll doesn’t stop at tortas. They’re also excellent served alongside soups and stews, perfect for dipping and soaking up flavorful broths. Imagine a warm bolillo with a bowl of pozole or menudo—it’s, you know, a match made in culinary heaven. They can also be enjoyed simply with a smear of butter or jam for breakfast or a light snack. Some people even use them to make

Bolillo
Pan Bolillo Recipe
Pan Bolillo Recipe
