Preserving Nature's Beauty: A Gentle Guide To Pressing Flowers
Detail Author:
- Name : Dr. Art Lebsack II
- Username : iwaelchi
- Email : kbraun@kuhlman.org
- Birthdate : 1982-06-03
- Address : 809 Jenkins Pines New Laney, KY 89531
- Phone : +1 (443) 254-8711
- Company : Thompson-Schulist
- Job : Geoscientists
- Bio : Sed quis dolores maiores. Vel officiis ipsa at. Distinctio qui impedit qui quae quis veniam quos.
Socials
twitter:
- url : https://twitter.com/twila_flatley
- username : twila_flatley
- bio : Beatae aperiam ab odit atque officiis dolores. Ullam cum similique voluptatum eligendi quod debitis nobis fuga. Quae mollitia nulla harum.
- followers : 3362
- following : 749
tiktok:
- url : https://tiktok.com/@twila1545
- username : twila1545
- bio : Cumque debitis cupiditate quam et quia reprehenderit ipsa.
- followers : 122
- following : 1576
instagram:
- url : https://instagram.com/twilaflatley
- username : twilaflatley
- bio : Nostrum eum repellendus molestias molestiae. Quam occaecati quis voluptatem.
- followers : 1033
- following : 2602
facebook:
- url : https://facebook.com/flatley1989
- username : flatley1989
- bio : Quidem totam repudiandae magni quis in.
- followers : 2858
- following : 1251
There is a kind of gentle magic in holding onto moments, isn't there? That, is that, something about keeping a bit of beauty from fading feels, in a way, very important. We often hear the word "pressing" in many different ways, like when we talk about a "pressing problem" that needs quick attention, or a "pressing need" for something right away. Yet, when we talk about pressing flowers, it is a much calmer, quieter kind of work. It is about applying a steady, careful weight to something delicate, helping it stay lovely for a long time.
This careful action helps us hold onto the natural color and pretty shape of a flower. It is a simple way to turn a fresh bloom into a lasting piece of art. The process, you see, helps to remove water from the plant material. It also keeps light from getting to the flower too much. This makes the flower keep its charm and look good for years. So, it is a wonderful method for anyone wanting to save special blooms.
This guide will show you all you might want to know about this timeless craft. We will look at good ways to do it, helpful hints, and some common slip-ups to steer clear of. You can, you know, create your own beautiful pressed flowers yourself. We will cover several methods, too, so you can pick the one that feels right for you. As of late 2024, more people are finding joy in these quiet, hands-on activities.
Table of Contents
- Understanding the Art of Pressing Flowers
- Why Press Flowers?
- Choosing the Right Flowers
- Getting Ready Your Blooms
- Methods for Pressing Flowers
- Helpful Hints for Success
- Common Slip-Ups to Avoid
- What to Do with Your Pressed Flowers
- Frequently Asked Questions
- Your Next Step in Flower Pressing
Understanding the Art of Pressing Flowers
Pressing flowers, in its simplest form, means putting flowers under a bit of weight. This weight, you see, removes their moisture. It is a way of preserving them. This is quite different from other meanings of "pressing," like when we talk about a large number of records or CDs made with a press. Or when someone talks about "pressing business needs urgent attention." Those things, naturally, require quick solutions. Flower pressing is a slow, calm act.
The main idea behind pressing flowers is to take away water. This stops the flower from going bad. It also helps the flower keep its pretty shape and color. It is, in a way, like stopping time for that bloom. This kind of pressing is about careful, gentle force. It is not about urgency. It is about quiet preservation. We are applying pressure, yes, but for beauty, not for a problem that needs to be solved right away.
Why Press Flowers?
People press flowers for many reasons. One big reason is to save flowers from a special day. Think about a wedding bouquet, for instance. Or maybe flowers from a birthday or an anniversary. These blooms often hold very dear memories. Pressing them helps you keep those memories close. It is a lovely way to remember a moment. This is a very human reason, you know, to want to hold onto things that mean something.
Another reason is to make art. Pressed flowers can become part of pictures, cards, or even jewelry. They add a natural touch to things you make. It is a craft that lets you be quite creative. You can make gifts for others or pretty things for your own home. It is a simple, yet very satisfying, creative outlet. People often find it a calming activity, too.
For some, it is about enjoying nature indoors. You can pick flowers from your garden or from a walk. Then, you can bring their beauty inside your home in a new form. It is a way to appreciate the small wonders of the natural world, even after they are picked. So, it is more than just a craft; it is a connection to nature.
Choosing the Right Flowers
Picking the best flowers for pressing makes a big difference in how they turn out. Flowers that are naturally flat tend to work very well. Think about pansies, violas, or single-petal roses. They have less bulk, which helps them dry evenly. Flowers with too many layers, like big, fluffy roses, can be a bit harder. They might mold if the moisture does not leave them fast enough.
The freshness of the flower also matters a lot. You want to pick flowers that are just opened or nearly open. They should be free of any spots or damage. Flowers that are already wilting or have brown edges will not look good when pressed. So, try to pick them when they are at their best. Early morning, after the dew has gone, is often a good time. This way, they have less extra water on them.
Some flowers keep their color better than others. Bright, bold colors often stay true. Yellows, blues, and some pinks can hold up quite well. Reds sometimes turn a bit darker, like a deep burgundy. White flowers can, you know, sometimes turn a bit brown or see-through. It is a bit of an experiment to see what works best with what you have. But, overall, flatter, fresh blooms are a good start.
Getting Ready Your Blooms
Before you start the actual pressing, you need to get your flowers ready. This step is pretty simple, but it is important for good results. First, you want to pick your flowers when they are dry. This means no dew or rain on them. If they are wet, they might go bad during the pressing. So, if you just watered your garden, wait a bit before picking.
Next, you might want to remove any extra leaves from the stem. You only need the parts you want to press. Some people like to press leaves too, which is fine. But for the flower itself, trim away anything that does not add to its look. This also helps the flower fit better in your press or book. It is about making things neat, you know.
If your flowers have thick centers, you might need to cut them in half lengthwise. This helps them dry flatter and more evenly. For example, a thick rosebud might need this. Just be gentle when you do it. The goal is to make sure all parts of the flower can lose moisture well. This simple bit of prep can make a big difference.
Methods for Pressing Flowers
There are several good ways to press flowers. Each method has its own pros and cons. You can pick the one that fits what you have and how fast you want the results. We will look at four popular methods here. After seeing how each works, you can decide which is right for you. Some are very traditional, while others are a bit quicker.
Traditional Book Pressing
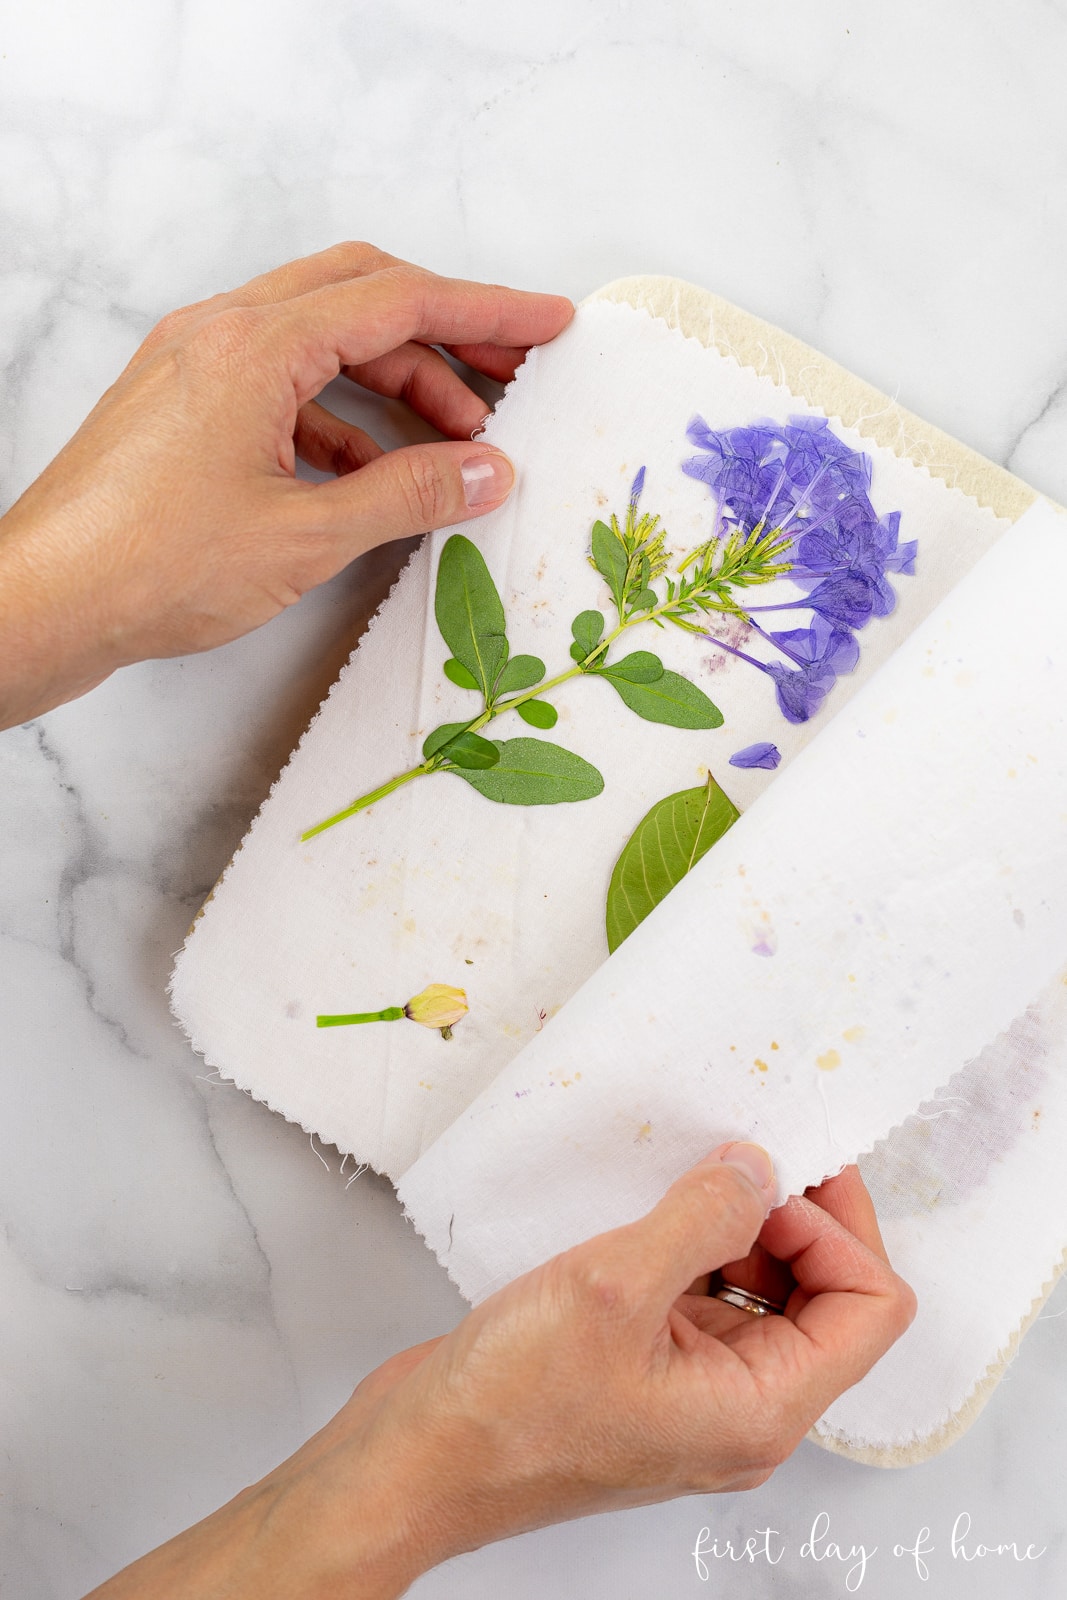
Using a heavy book is a classic way to press flowers. It is probably the most common method people think of. You just need a big, heavy book, like a phone book or a dictionary. The paper in the book helps soak up the water from the flowers. This method is slow, but it often gives very good results. It is also very simple, you know, and does not need special tools.
To do this, open your book to a page in the middle. Place a piece of plain paper or parchment paper on the page. Then, arrange your flowers on this paper. Make sure they are not touching each other. You want them to lie flat. Put another piece of plain paper on top of the flowers. Then, close the book very carefully. You can stack more heavy books on top for extra weight. This helps apply good, even pressure.
You will need to wait for a few weeks, maybe two to four weeks. Check on them every few days by carefully opening the book. You might want to change the paper around the flowers after the first week. This helps with moisture removal. The downside is the wait time. But the results are often quite lovely. This method is very gentle on the flowers, too.
Using a Flower Press
A flower press is a tool made just for this purpose. It usually has two pieces of wood with bolts and nuts. Between the wood pieces, you layer cardboard and blotting paper. This setup gives very even pressure. It is a bit like the pressing that happens when a metal or plastic part is made with a press, but much, much gentler. This tool is, you know, made specifically for this craft.
To use a flower press, you lay down a piece of cardboard, then a piece of blotting paper. Arrange your flowers on the blotting paper. Make sure they are not too close. Then, put another piece of blotting paper on top, followed by another piece of cardboard. You can make several layers like this. Once all your flowers are in, put the top piece of wood on. Then, tighten the nuts on the bolts. Tighten them a little more each day for the first few days.
Like the book method, this takes time. It usually takes about three to four weeks. The blotting paper is very good at soaking up water. This method often gives the best results for keeping flower shape and color. It is a bit of an investment to buy a press, but it is a very useful tool if you plan to press flowers often. It is a very reliable way to do it, too.
Microwave Pressing
If you are looking for a faster way, microwave pressing can work. This method uses heat to quickly remove moisture from the flowers. It is much quicker than books or a traditional press. You will need a microwave-safe press or two ceramic tiles and some paper towels. This is a good choice if you are, you know, a bit impatient.
To do this, place a paper towel on a ceramic tile. Arrange your flowers on the paper towel. Put another paper towel on top, then another ceramic tile. You can secure them with rubber bands if you want. Put this setup in the microwave. Heat for 30 seconds on medium power. Let it cool for a bit, then check the flowers. Repeat in 10-second bursts until the flowers feel dry and stiff. This might take a few minutes in total.
Be careful not to burn the flowers. They can go from pressed to crisp very fast. This method is great for small, flat flowers. It might not work as well for thicker blooms. The colors might not be as vibrant as with slower methods. But, for quick results, it is a very good option. It is a very modern way to do an old craft.
Iron Pressing
Using an iron is another quick method. This is a bit like the process of improving the appearance of clothing by pressing it. But here, you are doing it for flowers. You need an iron, some parchment paper, and a hard, flat surface. This method is also fast, but it needs a bit more care. You are, you know, using heat, so you must be careful.
Place your flowers between two sheets of parchment paper. Make sure they are flat and not overlapping. Put this paper sandwich on a hard surface, like an ironing board. Set your iron to a low heat, with no steam. Press the iron down on the paper for about 10-15 seconds. Lift the iron, let the flowers cool for a moment. Then, press again. Repeat this until the flowers are dry and feel like paper. This might take several rounds.
Do not slide the iron. Just press it straight down. Sliding can wrinkle or tear the delicate flowers. This method works best for thinner flowers. It is a good option if you only have a few flowers to press and want them done quickly. The heat helps to dry them out fast. Just remember to use a low setting and no steam. That is a very important part.
Helpful Hints for Success
Getting good results with pressing flowers often comes down to a few simple things. First, always pick fresh flowers. Flowers that are already wilting or have too much water will not press well. This is a very basic, but very important, rule. You want the flowers to be at their peak when you pick them.
Second, use absorbent paper. Blotting paper, plain newsprint, or even coffee filters work well. Avoid paper with a lot of print, as the ink can transfer to your flowers. This paper helps pull the moisture out. It is a very simple, yet effective, tool. You can find blotting paper at craft stores, or just use what you have around the house, like paper towels.
Third, apply even pressure. This is key for flat, pretty flowers. If the pressure is uneven, parts of the flower might not dry well. This can lead to mold or a less pleasing shape. So, make sure your books are stacked straight or your press is tightened evenly. It is, you know, all about gentle, steady force.
Fourth, be patient, especially with slower methods. Good things take time. Rushing the process can damage the flowers or lead to poor drying. Let them dry fully before you take them out. This patience will be rewarded with beautiful, lasting blooms. It is a very rewarding process, too, to see the final result.
Finally, store your pressed flowers carefully once they are dry. Keep them in a dry, dark place. This helps them keep their color. A sealed box or a photo album can work well. Light and moisture are the enemies of pressed flowers. So, protect them after all your hard work. This is a very important last step.
Common Slip-Ups to Avoid
Even with good instructions, people sometimes make small errors when pressing flowers. One common mistake is pressing flowers that are too wet. If there is still dew or rain on them, they will not dry well. They might even get moldy. So, always make sure your flowers are dry to the touch before you start. This is a very common issue, you know, for beginners.
Another slip-up is putting too many flowers in one spot. If flowers overlap or are too crowded, they will not dry evenly. They might stick together or get squished in a bad way. Give each flower its own space. This allows air to move around them, which helps with drying. It is a very simple thing to remember.
Using the wrong kind of paper can also cause problems. Shiny paper, like magazine pages, does not soak up moisture. This can trap water with the flower. Always use paper that is absorbent. This is why plain paper or blotting paper is best. It is a very small detail, but it matters a lot.
Not changing the paper in slower methods is another mistake. The paper gets wet as it pulls moisture from the flowers. If you do not change it, the wet paper can slow down drying or even cause mold. So, change the paper every few days, especially at the start. This helps the drying process along. It is a very good habit to get into.
Finally, taking flowers out too soon is a common issue. If they are still soft or bendy, they are not fully dry. They will likely curl up or get damaged once they are out of the press. Wait until they are stiff and feel like paper. Patience, you know, is key here. It is better to wait a little longer than to ruin your work.
What to Do with Your Pressed Flowers
Once your flowers are perfectly pressed, a whole world of creativity opens up. You can use them for so many projects. One popular idea is to make cards. Pressed flowers add a lovely, natural touch to handmade greeting cards. They make the card feel very special. This is a very popular way to use them, you know, for gifts.
You can also frame them. Arrange a few pressed flowers on a piece of nice paper. Then, put them in a picture frame. This creates a beautiful piece of wall art. It is a simple way to bring nature's art into your home. This looks very elegant, too. Some people even make large collages with many different pressed blooms.
Another idea is to use them in scrapbooks or journals. They add a personal touch to your memories. You can press flowers from a special trip or event and put them right next to your photos. It is a very personal way to tell a story. This makes your memories even more vivid, you know, when you see the actual flower.
Some people even use pressed flowers to make jewelry or resin art. They can be sealed in clear resin to create pendants or keychains. This is a bit more advanced, but it makes truly unique items. It is a very creative way to keep the flowers close to you. This kind of craft is gaining popularity, too.
Think about wedding bouquet preservation. Many people want to keep their wedding flowers forever. Pressing them is a wonderful way to do this. You can turn them into a framed piece of art or a special keepsake. This is a very meaningful way to save those precious memories. It is a very popular choice for brides, too.
Frequently Asked Questions
How long does it take to press flowers?
The time it takes to press flowers really depends on the method you pick. For traditional book pressing or using a wooden flower press, it can take about two to four weeks. Faster methods, like microwave or iron pressing, can be done in just a few minutes or hours. It is, you know, a big difference in speed.
What kind of flowers are best for pressing?
Flowers that are naturally flat or have single layers work very well for pressing. Think about pansies, violas, small daisies, or single-petal roses. Flowers with less bulk tend to dry more evenly and keep their color better. They are, you know, just easier to handle for this craft.
Can you press flowers without a press?
Yes, you absolutely can press flowers without a special press. Using heavy books is a very common and effective way to do it. You can also use a microwave or an iron for quicker results. There are many ways to get started, you know, even if you do not have special tools.
Your Next Step in Flower Pressing
Pressing flowers is a beautiful and timeless craft. It allows you to preserve your favorite blooms. You can transform them into lasting pieces of art or cherished keepsakes. It is a quiet, rewarding activity that connects you with nature. So, why not give it a try? It is a very simple process to begin.
Whether you choose the slow, traditional way or
Flower Pressing Materials at Rafael Gilliam blog
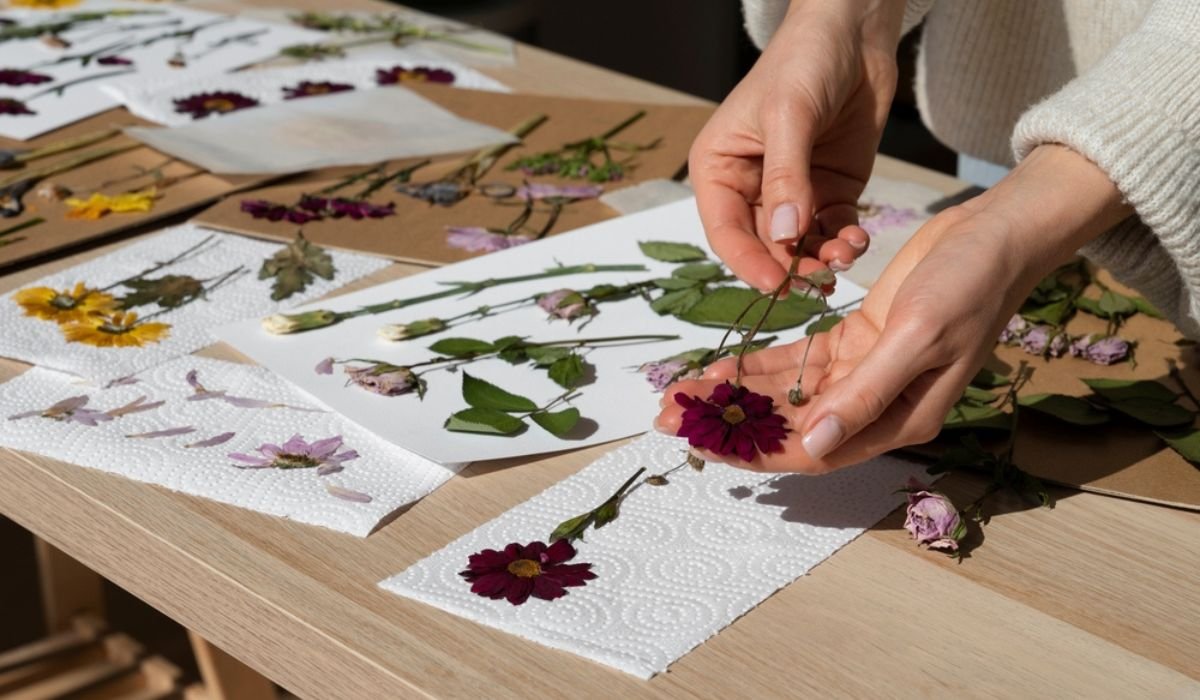
Steps for drying and pressing flowers

How To Press Flowers + Make a DIY Flower Press | Pressed flowers
